Logging into Pentaho
Before any interaction with Pentaho, the user must be authenticated through a valid session. To get a valid session in Pentaho you will need a login form, to ask for user's credentials (username and password). Of course you could reuse a login form you already have into your existing application, but in this section you will learn how to develop a very basic login component from scratch.
1. Creating the login component
To create a new component into your application, open a terminal and execute the following command from the root of your project.
ng g component login
This command creates the login folder into app and setup the project to work with it.
2. Adding the login component to routing
Of course, you want your new login page to be routed into your application, in this case on /login path. To reach that goal, edit the app.module.ts file into the src/app path and the following routing.
const appRoutes: Routes = [
  ...,
  { path: 'login', component: LoginComponent }
];
3. Adding the new page to the main menu
In our basic case the main menu is defined directly into the app.component.html file into the src/app folder. To add the link, edit the html file and add the following source code in the menu area.
...<br/>
<a routerLink="/login">Login</a>
4. Developing the LoginComponent
Once done, it's time to develop the login component.
4.1. Developing the HTML
Edit the login.component.html file into src/app/login folder, as following.
<form>
  <div class="form-group">
    <label for="username">Username</label>
    <input #username type="text" required />
  </div>
  <div class="form-group">
    <label for="username">Password</label>
    <input #password type="password" required />
  </div>
  <button type="submit" (click)="onSubmit(username.value, password.value)">Submit</button>
</form>
<p>{{loginMessage}}</p>
To make the login form more "sexy", feel free to use a different HTML.
4.2. Developing the Typescript
Edit the login.component.ts file into src/app/login folder, as following.
import { Router } from '@angular/router';
import { PentahoDashboardService } from 'pentaho-dashboard';

...

  loginMessage = '';

  constructor(
    private router: Router,
    private pentahoDashboardService: PentahoDashboardService) { }

  onSubmit(
    username: string,
    password: string) {

    if (this.pentahoDashboardService.isLoggedIn()) {
      this.router.navigate(['/']);
    }
    else {
      this.pentahoDashboardService.setUsername(username);
      this.pentahoDashboardService.setPassword(password);
      this.pentahoDashboardService.logIn('/');
      if (this.pentahoDashboardService.isNotLoggedIn()) {
        this.loginMessage = 'Cannot login on Pentaho.<br/>Try to login again.';
        return false;
      }
    }
  }
5. Using the login
Once done, run the npm start command from a terminal and open a browser at http://localhost:4200. Clicking on the Login link, this is what you are going to see.
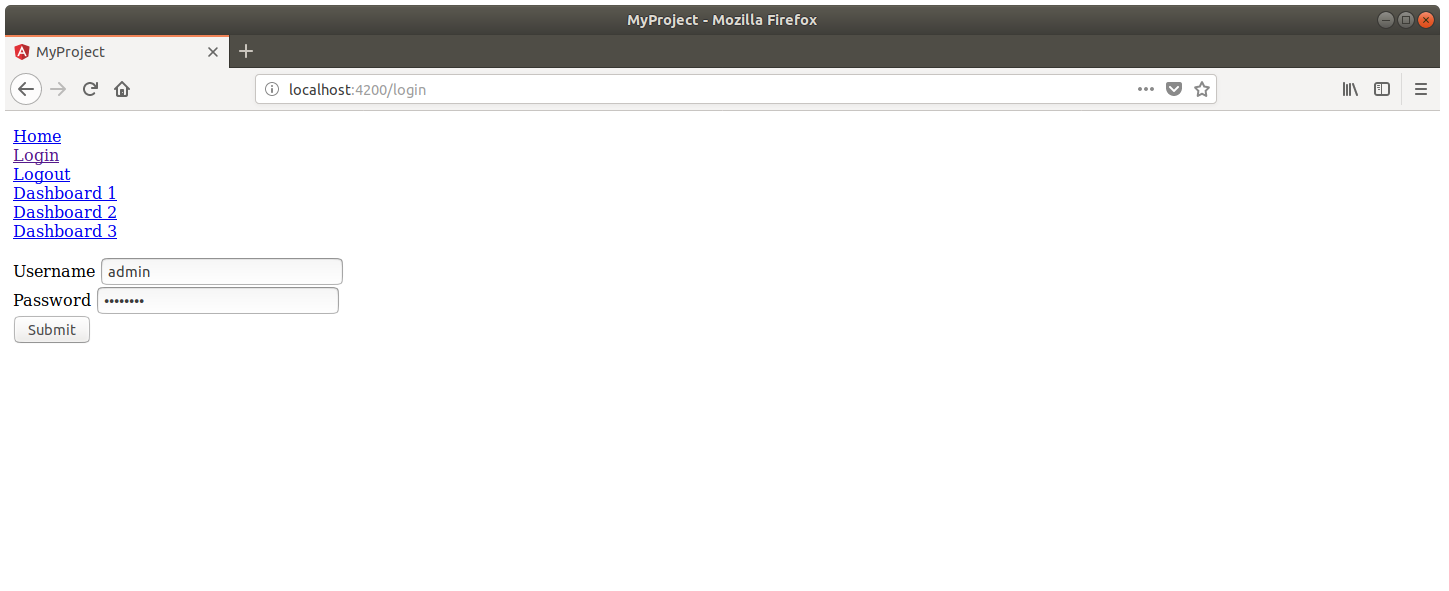 Filling the requested fields with a username and password valid in Pentaho, you will have access to a new session, ready to be used into your application.
As an example, you can try with:
- Username: admin
- Password: password